Making your own rolled edge lampshade is not as difficult as one might imagine and only takes around 1 hour. This is the second lampshade I have made for my home and I love that I can choose a fabric which compliments my home decor and neutral color schemes. I’ll show you how to make your own in this step by step tutorial below!


30cm lampshade rings (for top and bottom)Self adhesive panel measuring 95 x 25cmStrong double sided sticky tape (suitable for fabric)Cotton fabric measuring 100 x 40cmScissorsCraft KnifeRulerTucking Tool
(You may wish to purchase a lampshade making kit, which usually has all of these items included).
Place the fabric right side down with enough room to flatten the entire length. Smooth out any creases.Prepare your self adhesive panel by using the craft knife and ruler to score a 1cm border on each long edge.

Position the self adhesive panel on top of the wrong side of the fabric and mark the corners with a pencil. Here you should take note of the design of the fabric, especially if there is a pattern to match up.

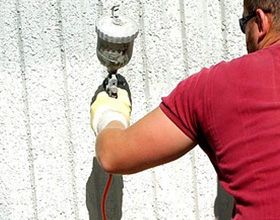
When you are happy with the position, peel back around 10cm of the backing to expose the adhesive panel and stick down in line with your pencil marks. Smooth to reduce air bubbles.Slowly begin to pull out the remaining back paper and smooth the self adhesive panel onto the fabric.

Then cut the fabric around the panel. In the end, I trimmed this to around 0.5cms.

Snap back the scored edges along the long sideof the self adhesive panel and remove the strips.

Take both rings and cover them completely in the double sided sticky tape.


Add a strip of sticky tape on one of the short edges of the fabric, to stick the join when you are finished.

Remove the backing from the double sided sticky tape on both of the rings.

Place your rings next to the long edge of the backing as shown. Here you need the now sticky rings to adhere to the fabric.

Carefully roll the rings along the fabric to form the lampshade shape. Make sure the rings are sticking evenly to the fabric as you go. Here it might help to have an extra pair of hands!

Once your lampshade is formed, remove use the double sided sticky tape on the short edge of the fabric to secure.

Now roll the fabric over the edge of the sticky rings and use the tucking tool to hide the raw edge. Trim any frayed areas of fabric.

Now your lampshade is ready to hang!


Gisele Bundchen's contemporary twist on this emerging design trend is the talking point of her kitchen
Zendaya taps into the subtle power of this accessory to ensure her neutral living room is never boring
Amazon has become a go-to for chic home decor – here’s what we’re shopping from the 2024 Spring Sale
This designer's 'every seat needs a surface' rule has changed my living room layout forever – here's what I mean
5 designer Amazon storefronts that make shopping for stylish homeware so much easier
Joanna Gaines' 'mesmerizing' garden is the perfect example of how to grow cut spring flowers at home
Tan France opts for this stabilizing color palette to 'ground' his guest cottage, experts say
Shark's St Patrick's Day sale is here - and you can save $100s on vacuums and air purifiers
Matthew and Camila McConaughey's raw cabinets possess a texture and warmth that's replicable in our kitchens
Ideas for Decorating a Windowless Room
Winter Home Maintenance Checklist For Before the Cold Weather Arrives
10 Expert Fixes to Flush Your Clogging Woes Away
How Long Can You Expect Your Water Heater to Last?
How Much Does it Cost to Replace a Water Heater?
Coffee Grounds for De-Icing: Does It Work?
16 Kid’s Room Paint Ideas to Inspire Creativity and Joy
Don’t Make These Rain Barrel Blunders! Top 6 Mistakes to Dodge
Tank vs. Tankless Water Heater: Which is Right for You?
Water Heater Maintenance Checklist
 zpostcode
  Recruit
  weather
  mreligion
  Yellowpages
  sport
sport  constellation
  shopping
  name
name  game
game  directory
  literature
  Word
Word  tour
tour  furnish
  Lottery
  tftnews
  lyrics
  News
News  digital
  car
car  dir
dir  Edu
Edu  Finance