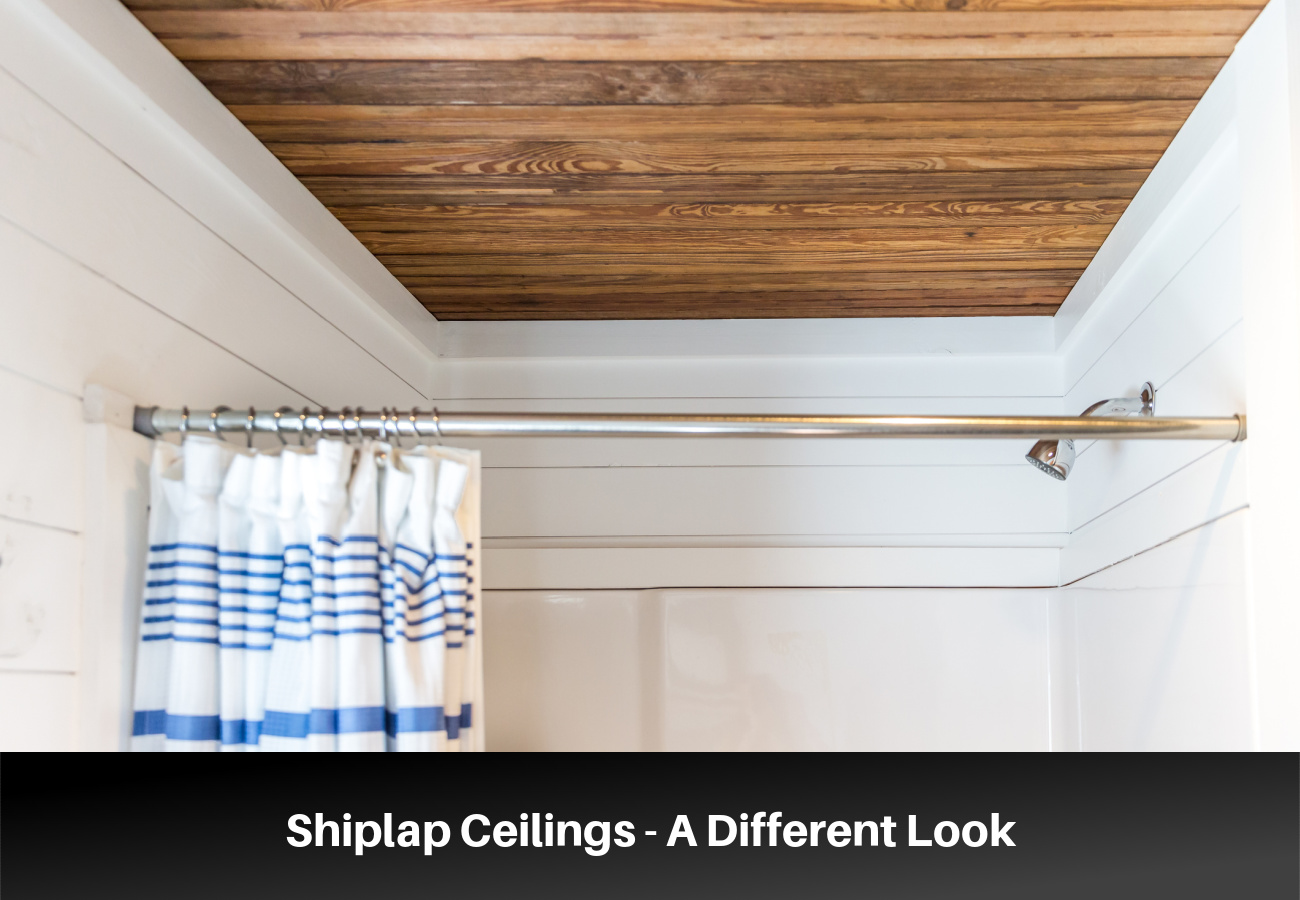
A shiplap ceiling is a visually appealing and textural architectural element that adds character and style to any room. Shiplap ceilings feature shiplap wood panels, a unique and historic type of wood plank with a groove on each side. Shiplap boards are inexpensive, easy to mill, and simple to install. Shiplap boards are manufactured from three inches to twelve inches wide. They are usually ¾” thick and available in random lengths.
Shiplap has grown in popularity as a paneling material for both the interior and exterior of homes and commercial buildings. Shiplap planks are a popular wall feature that can be used to cover the entire room as well as accent walls. Shiplap ceilings are a subtle but noticeable way to add interest to a room.
Shiplap ceilings are useful for decorative and functional purposes. Shiplap adds the look and feel of real wood. Depending on the material chosen, a ceiling can be made to look rustic or modern. Use it as a stand-alone feature or to complement the shiplap walls.
Most shiplap is 3/4” thick. Making it a good option for renovations. It will go over conventional ceilings and textured ceilings and retain its shape.
Shiplap products have some small soundproofing and insulating properties. For better soundproofing and insulation, it is a simple job to install rigid foam board insulation before the shiplap. Longer fasteners or furring strips may be needed for a secure shiplap installation.
Strapping or furring strips will also be needed if the shiplap is being installed parallel to the ceiling trusses or joists. This provides backing for fasteners. The strips should be installed perpendicular to the structural members at 16” or 24” in the center. The minimum size of strapping should be 1 x 2. Thicker and/or wider strips help prevent warping.
Shiplap ceilings are also useful for covering minor ceiling imperfections. They are the ideal solution to unsightly colored ceilings and water stains that persist despite countless coats of stain-covering paint. Be sure to repair any underlying problems, such as water leaks, before installing shiplap ceilings, as they are prone to water damage just like other ceiling materials.
Shiplap material is available in many sizes, shapes, and different types of material. Here are some of the most popular.
New shiplap planks are available in sizes from 1 x 3 to 1 x 12. The most popular boards are 1 x 4, 1 x 6, and 1 x 8. (As with most lumber, the actual lumber will measure something like ¾” thick x 5 ½” wide.) Actual coverage varies depending on the amount of overlap.
Natural wood shiplap comes in many textures and colors. Different types of wood offer different grain patterns. Wood is easy to paint or stain. Natural wood shiplap is available in softwood or hardwood. Some of the more popular options include:
Softwood Varieties. Redwood, cedar, pine.Hardwood Varieties. Poplar, acacia, golden teak.
Shiplap was one of the favored building materials for siding, sheathing, and roof decks. Finding it and salvaging it is not difficult. Old houses, barns, and factories provide lots of product. Reclaimed shiplap can be refinished or left natural to match any design.
Plywood is a good alternative to natural wood or reclaimed wood planks. The veneer on plywood has wood grain and knots that make each board look like solid wood. The available choices of wood veneer combined with paints and stains provide multiple finishing options.
Good One Side plywood is often used to manufacture shiplap boards. Running a sheet of ¾” plywood through a table saw will provide eight 1 x 6 (nominal) boards 8’ long. Putting a dado blade on the saw and running each board through two more times will produce the rabbeted edges of shiplap.
There is no need to rabbet the edges. Just paint the ceiling with the same paint as the plywood. Install each board against the other, using either nickels or dimes as spacers. With the same background color, it is virtually impossible to tell the difference.
MDF is a manufactured wood made of sawdust and glue. The boards can be bought unpainted, primed, painted, or with a melamine finish. MDF shiplap boards are available in various lengths. For a smooth, unblemished, finished-looking ceiling, MDF is a great choice. It does not have knots, cracks, or woodgrain.
MDF is easy to paint. MDF is next to impossible to stain because stains cannot be absorbed by glue. Using MDF for ceilings in bathrooms is not a good idea. It absorbs water readily and swells. Once swollen, it will not return to its original shape. Moisture-resistant MDF is available.
PVC shiplap boards are a better choice for any high-moisture or high-humidity room. PVC does not absorb moisture. It is the same material as vinyl windows and similar to plastic plumbing pipes.
PVC shiplap is available in many colors. The finish options include matte, semi-gloss, or gloss. Making it a good choice for any ceiling in the house. PVC is more expensive than most other shiplap options.
Composite lumber shiplap requires two people for installation. It is heavy and very flexible. It is available in a wide range of colors and has a soft woodgrain appearance. The composite is dense and heavy. It adds a significant amount of mass to the ceiling, making it an excellent sound-suppressing acoustic material between floors.
Metal shiplap-style wall panels can be used as siding, soffit, or ceiling covering. They are rich in color and easy to install with hidden fastening systems. Available in multiple colors and patterns from different manufacturers.
Installing a shiplap ceiling can be a DIY project, but it does require some specialized tools and entry-level carpentry skills. Consider the following steps to see if you think that you could install your own shiplap ceiling.
Gather the ToolsShiplap boardsScrewsMeasuring tapeChalk lineSanding pad, wood putty, and knifeLevelMiter saw or circular sawJigsawSafety glasses and hearing protectionDrill/screwdriverStud finderConstruction adhesive (optional)Paint or other finish of choiceEvaluate the Ceiling
Consider the state of the ceiling before you begin. Shiplap will look best when installed on a flat, bump-free surface. Remove any surface elements, like molding or lighting, so that you can install the shiplap without obstructions.
Measure and Plan
Measure the length and width of your ceiling area. Multiply them together to get the square footage. Draw a rough sketch of the dimensions if your area is irregular. Add together all of the length and width dimensions, then multiply the two numbers. Add 10% to the total number to account for any wastage. To get the total number of boards you need, divide this total by the square footage of the board size you want to use. If the number is a decimal, round it to the next highest whole number. Use the following table as a quick reference for the amount of square footage covered by various shiplap plank sizes:
5” x 8’ = 3.33 sq ft5” x 12’ = 5 sq ft5” x 16’ = 6.66 sq ft7” x 8’ = 4.66 sq ft7” x 12’ = 7 sq ft7” x 16’ = 9.33 sq ftLocate the Ceiling Joists
Use the stud finder to locate the ceiling joists under the ceiling drywall. It is essential to attach the screws holding shiplap to the ceiling joists to create a more stable connection. Mark the ceiling joists with a light pencil marking.
You should install the shiplap perpendicular to the existing ceiling joists. Take your chalk line and snap straight lines across the ceiling, parallel to the direction of the future shiplap planks.
Prepare the Shiplap Boards
Consider the condition of your shiplap boards before you install them. You may need to lightly sand them or fill holes in the planks. Doing this before you install them is much easier than after.
Install the First Board
Measure the length of the area where you are installing the first shiplap plank. If this dimension is longer than the board, cut the board to fit the length of the wall. Be sure to leave a ⅛” gap on either side to allow for board expansion. Use a level and the chalk lines to ensure that your board is straight. Following the pencil markings, attach a screw into the plank along the ceiling joists.
Attach Remaining Boards
Proceed by attaching the other shiplap boards in place. Measure and cut each board individually, as the ceiling walls may vary slightly in length and width. As you come to openings in the ceiling, like those for lights, hold the board up and measure to determine the opening size, location, and shape. Remove the board and cut the opening with a jigsaw. Attach the board once you have created the opening.
The last board may not be full-width. If you need to adjust this, rip the board down its length to create the size you need to finish.
Finishing
When you are finished installing the last board, evaluate it for the finish coat. You may need to lightly sand it or put wood putty in any holes you may have missed.
Ceilings attract dust and grime, so some type of ceiling finish is recommended. For paint finishes, you may want to prime it before you add coats of paint. Priming creates more adhesion and covers stains well. If you want a natural finish, use a clear sealer coat like lacquer or another type of varnish.

Gisele Bundchen's contemporary twist on this emerging design trend is the talking point of her kitchen
Zendaya taps into the subtle power of this accessory to ensure her neutral living room is never boring
Amazon has become a go-to for chic home decor – here’s what we’re shopping from the 2024 Spring Sale
This designer's 'every seat needs a surface' rule has changed my living room layout forever – here's what I mean
5 designer Amazon storefronts that make shopping for stylish homeware so much easier
Joanna Gaines' 'mesmerizing' garden is the perfect example of how to grow cut spring flowers at home
Tan France opts for this stabilizing color palette to 'ground' his guest cottage, experts say
Shark's St Patrick's Day sale is here - and you can save $100s on vacuums and air purifiers
Matthew and Camila McConaughey's raw cabinets possess a texture and warmth that's replicable in our kitchens
Flat Roof House Design Becomes The Phoenix Of Home Architecture
Houses In The Forest Offer Escape From City Living
Mobile Home Additions: Practical Ideas to Upgrade Your Manufactured Home
Small Mobile Homes for Tiny Living
Fiber Cement Siding Guide: Is this the Right Choice for Your Home?
Stone Siding Guide: Common Types and How to Add it to Your Home
Rambler House Architecture Prepares For A Second Act
The Wrap Around Porch Remains On Course For A Graceful Return
What Is a Ranch Style House? And More Interesting Facts You Should Know
Shingle Siding: What It Is and How Others Use It
 zpostcode
  Recruit
  weather
  mreligion
  Yellowpages
  sport
sport  constellation
  shopping
  name
name  game
game  directory
  literature
  Word
Word  tour
tour  furnish
  Lottery
  tftnews
  lyrics
  News
News  digital
  car
car  dir
dir  Edu
Edu  Finance