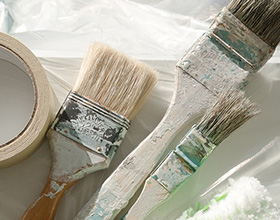
Of all the crafting techniques I do, this is easily mod podge photo transfer is my favorite. I just love to transfer photos and images! I get a kick out of the vintage, weathered appearance a project takes on by simply transferring images to wood.

This isn’t like decoupage….we’re not attaching the paper to a surface. This process involves keeping the pigment from the image and losing the paper, so it’s important to use the right materials for the technique to work correctly.

It’s an all-in-one glue, sealer, and finish you can use in crafting projects. It was invented in 1967, and you can find it in virtually all craft stores.
By definition, it’s a “synthetic resin made by polymerizing vinyl acetate used in paints and adhesives.”
It’s a glue used in DIY and craft projects. It is similar to glue because it will stick materials to most surfaces. But, it also serves as a sealer and varnish. The ingredients used to create the substance are stronger than standard and school glues.
Even though it’s white in liquid form, the substance is clear once dry.
Regular glue is something you can use for most crafts and simple adhesions. However, if you are working on decoupage projects or need a strong adhesive, mod podge is stronger than glue.
Mod podge is not like Elmer’s glue because it’s more substantial than most standard and school glue. And you can use the substance on almost every surface like:
PaperWoodFabricGlassCeramicTerra cottaTinCertain plasticsPainted surfaces
Preparing your surface – sand wood, wash glass, paint the exterior. Then let it dry.Next, you can cut your paper or fabric to fit perfectly on the surface.Apply the mod podge to the surface and back of your paper or fabric.Work quickly because it dries fast.Let dry 20 minutes before decoupaging over the top.Apply 2 to 3 more coats and let it dry for 24 hours before use.
Unfinished Wood PlaqueLaser copier printed photoMod PodgeTowelPaint
Print the photo using a LASER copier. Do not use ink jet, as the ink will just smear and bleed. You must use a laser copier or use a photocopy machine. Trim the image to fit the plaque.

Paint the surface of the plaque with an even layer of Mod Podge.

Place the paper image side down on the Mod Podge. Press firmly to make sure there are no air bubbles. Let it dry completely.

Get a towel wet, then wring it out completely so it is damp but not dripping wet. Press the towel on a section of the paper to wet it. Once you can see some of the image through the wet paper, scrub the paper gently. It will peel away and reveal the ink left on the wood. Continue until the entire image has been revealed.

Paint over the transferred image to seal it.


Paint the edge of the plaque, and let it dry. I chose to distress the paint finish so it would have a rustic, old look to make the photo image.

Add a bit of twine or a photo hanger to the back of the plaque to display your art! Imagine all the beautiful decor you’ll be able to create with this technique. Have fun crafting and creating with laser printed image transfers!
Depending on the variety you buy, it can be extremely water resistant. But it’s not waterproof.
Even though it looks like a white milky substance, it will dry clear when you apply it correctly. It won’t dry completely clear if you add too much mod podge to a surface.
In most instances, it’s incredibly long lasting. Unless it’s constantly exposed to weather or getting worn down, it will last for decades.
It’s a solid substance and can be difficult to remove. However, if it’s dried on glass, you can use a razor to scrape it off. And if it’s on wood, you can spray the podge with warm water and scrub it off. If it’s on paint or paper, you can expect the mod podge to remove whatever it’s adhered to.
After you complete your project, the substance can feel dry after an hour. However, you should leave it set out to dry for 24 hours so the project can set completely.
Mod podge works great for crafts and photo transfers you can do independently or with your friends and family. It makes for fantastic gifts and decorations that will last a long time.
Gisele Bundchen's contemporary twist on this emerging design trend is the talking point of her kitchen
Zendaya taps into the subtle power of this accessory to ensure her neutral living room is never boring
Amazon has become a go-to for chic home decor – here’s what we’re shopping from the 2024 Spring Sale
This designer's 'every seat needs a surface' rule has changed my living room layout forever – here's what I mean
5 designer Amazon storefronts that make shopping for stylish homeware so much easier
Joanna Gaines' 'mesmerizing' garden is the perfect example of how to grow cut spring flowers at home
Tan France opts for this stabilizing color palette to 'ground' his guest cottage, experts say
Shark's St Patrick's Day sale is here - and you can save $100s on vacuums and air purifiers
Matthew and Camila McConaughey's raw cabinets possess a texture and warmth that's replicable in our kitchens
15 DIY Barn Door Ideas For Inspiring Makeover Projects
Christmas Door Decor Ideas With Cheerful And Cozy Vibes
10 Cool And Practical Ways To Add Corner Shelves To Your Home
How To Build And Display Hanging Wall Shelves In Your Home
Simple and Versatile DIY Desks From Pipes And Wood
Original Christmas Tree Stand Ideas With DIY Charm
50 Valentine’s Day Decor DIYs To Display In Your Home
Solving The Standing Vs Wall Mounted Coat Rack Dilemma With DIY Ideas
Take The Winter Head On With A Cozy Fireplace Makeover
25 DIY Dorm Room Decor Essentials
 zpostcode
  Recruit
  weather
  mreligion
  Yellowpages
  sport
sport  constellation
  shopping
  name
name  game
game  directory
  literature
  Word
Word  tour
tour  furnish
  Lottery
  tftnews
  lyrics
  News
News  digital
  car
car  dir
dir  Edu
Edu  Finance