Tape-measure mistakes lead to wasted time, material loss, and frustration. Get more accurate measurements by correcting these seven easy-to-fix mistakes.
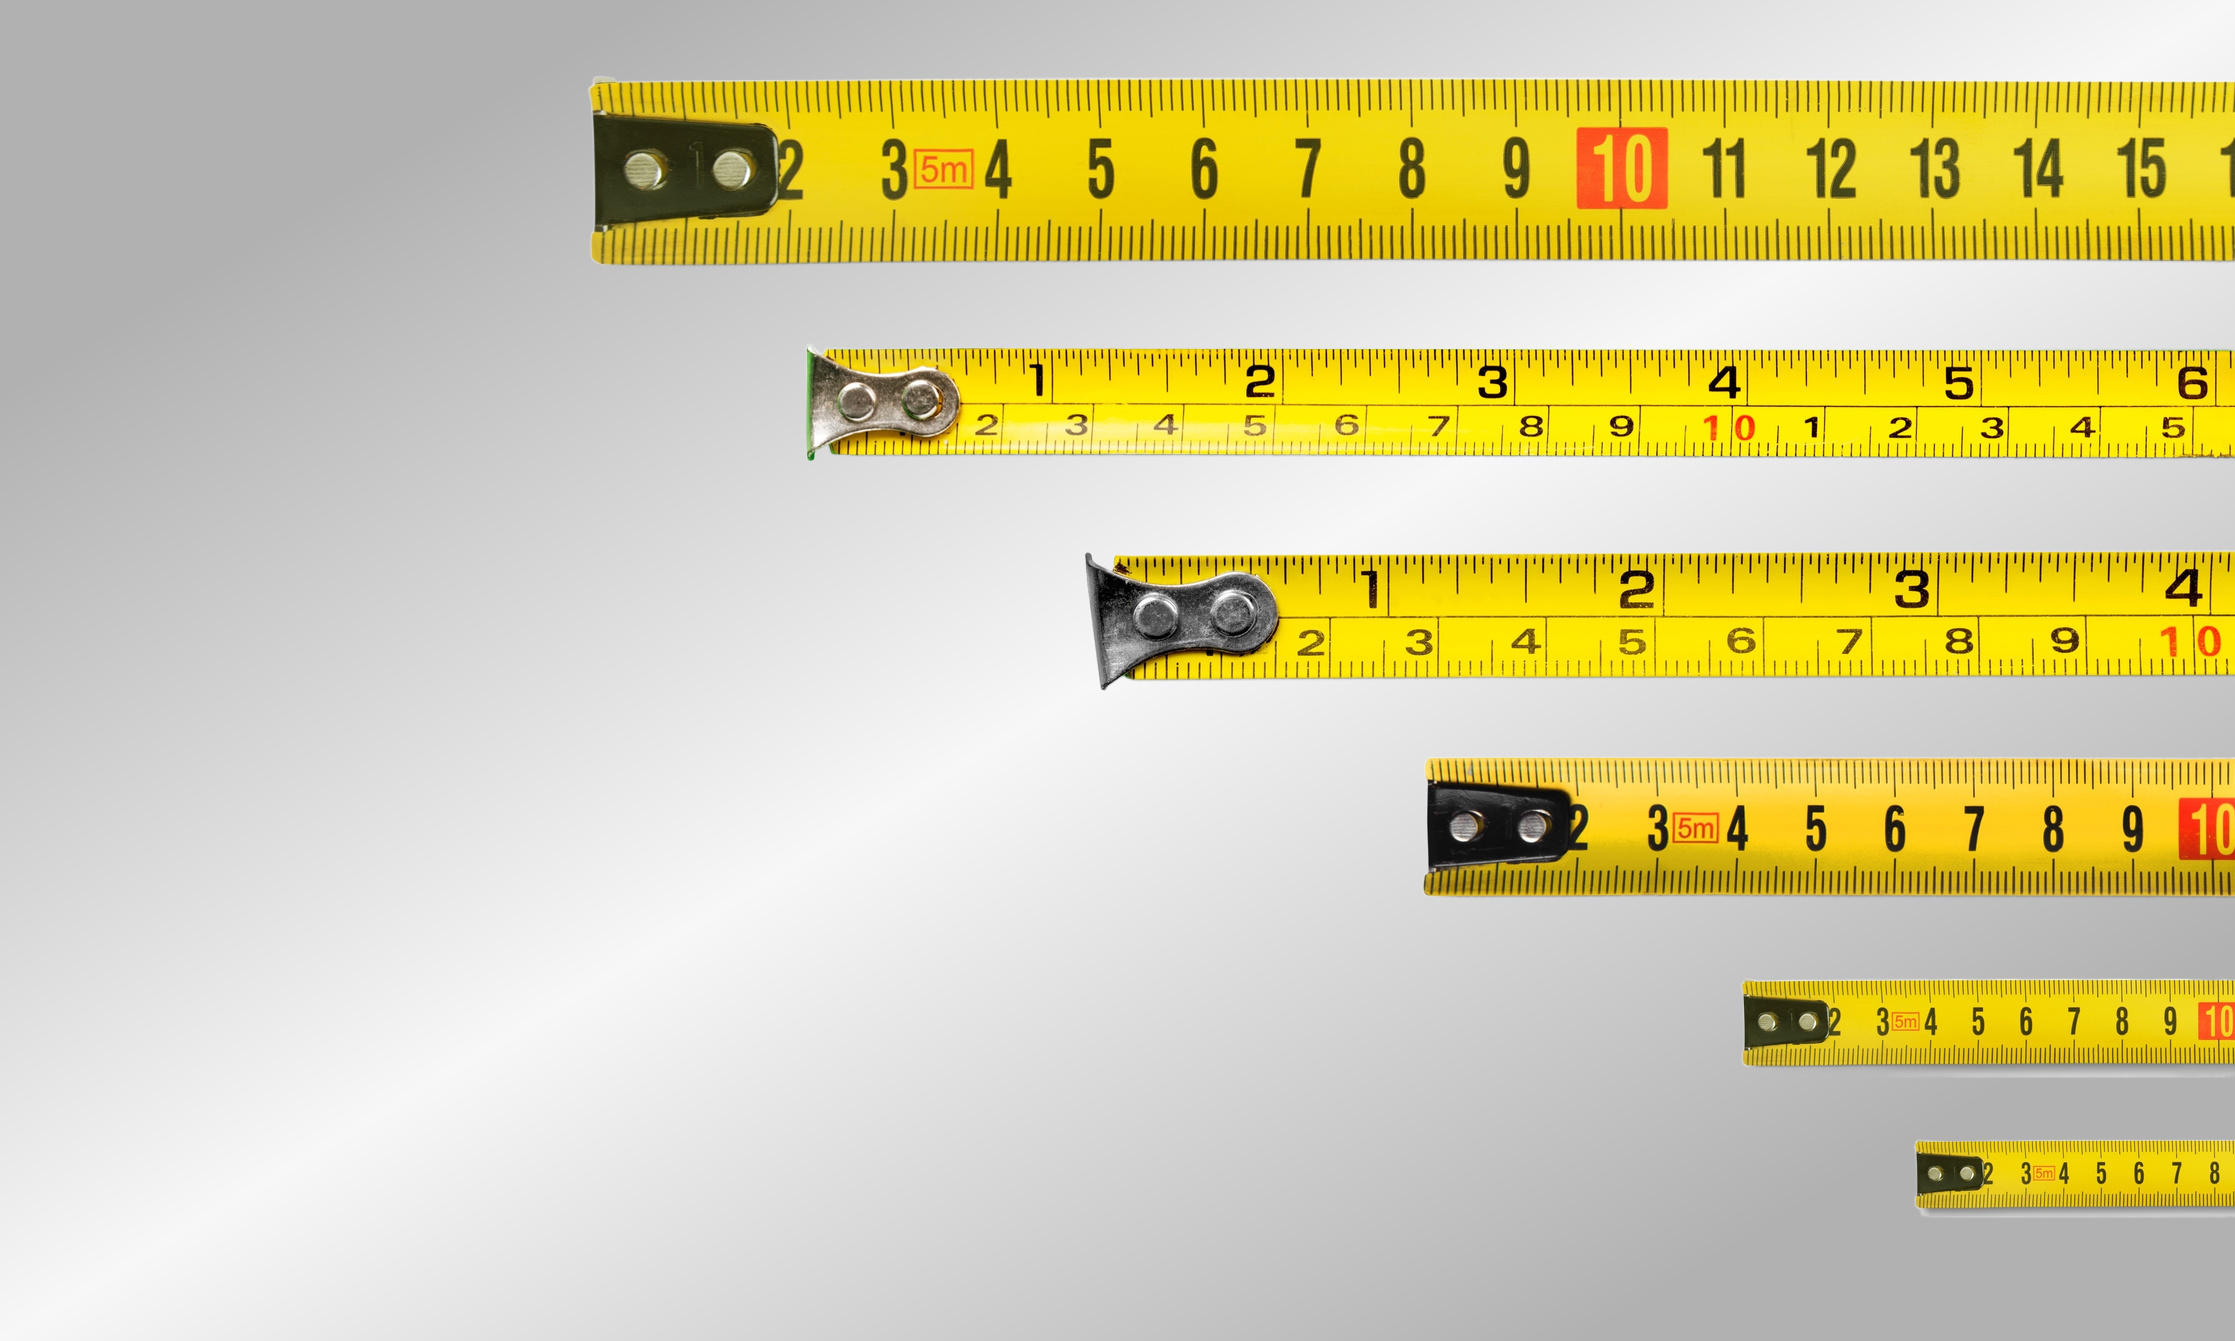
Inside-to-inside measurements, such as measuring the inside of a window frame, are challenging to take. Bending the tape measure might seem like the right thing to do, but will lead to inaccuracies if you don’t account for the bends.
To resolve this, add the tape measure’s base width to your measurement. The base width is often printed on the tape measure, three inches being the most common.
The amount of pressure you apply when extending the tape measure impacts the accuracy of your reading. Too much pressure causes the tape measure to bend, resulting in slight mismeasurements.
Not enough pressure causes the tape measure to slack, which can also give incorrect measurements. Fix this mistake by maintaining a consistent, gentle tension when extending the tape measure.
It’s common to slam the tape back into the housing after taking the measurements, but doing so can damage the metal tab, shifting it out of place. After you’re done taking measurements, slowly allow the tape to retract to prevent tab damage.
One of the parts of a tape measure is the hook. It’s a metal tab at the beginning that aligns with your subject’s edge.
Failing to hold the tape measure hook against the object can lead to skewed measurements. Avoid this error by properly positioning the hook against the edge of what you’re measuring and holding the tape measure straight to obtain an accurate reading.
An alternative is skipping the hook and using the one-inch mark as the “0” point instead. If you do this, don’t forget to add one inch when processing the final measurement.
You’ll get inaccurate readings if your tape measure is tilted or not perpendicular to the surface. It’s crucial to ensure proper alignment of the tape measure with the surface you’re measuring.
When measuring longer distances, have a stable base or support for the measuring tape. Holding the tape mid-air or relying on someone creates room for errors. Consider using a sturdy object or a measuring partner to ensure stability.
Parallax error occurs when you’re not viewing the tape measure straight on. Hence the measurement is different due to the angle of your line of sight. Make sure you’re looking at the measurement markings to avoid this mistake.
Avoid using a line, letter X, or other symbols for marking out your measurements. Use a V for the best visibility and accuracy. The exact measurement is the point where the two lines meet.
Double-check your measurements before making cuts or permanent changes to your project.
Reading the tape measure from left to right allows for precise readings. Reading from right to left affects the reading’s accuracy.
Apply similar measurement units throughout your project to avoid confusion. Mixing metric and imperial measurements will introduce errors in your readings.
Gisele Bundchen's contemporary twist on this emerging design trend is the talking point of her kitchen
Zendaya taps into the subtle power of this accessory to ensure her neutral living room is never boring
Amazon has become a go-to for chic home decor – here’s what we’re shopping from the 2024 Spring Sale
This designer's 'every seat needs a surface' rule has changed my living room layout forever – here's what I mean
5 designer Amazon storefronts that make shopping for stylish homeware so much easier
Joanna Gaines' 'mesmerizing' garden is the perfect example of how to grow cut spring flowers at home
Tan France opts for this stabilizing color palette to 'ground' his guest cottage, experts say
Shark's St Patrick's Day sale is here - and you can save $100s on vacuums and air purifiers
Matthew and Camila McConaughey's raw cabinets possess a texture and warmth that's replicable in our kitchens
How To make A Lampshade – DIY Woven Basket Lighting Fixtures
DIY Wooden Candle Holder – Candelabra with High Style at Low Cost
DIY Plywood and Elastic Memo Board
How To Make Pot Holders – A Universal And Customizable Hostess Gift
DIY Ampersand Symbol Cork Coasters
Yarn Crafts for Holidays – DIY Mini Christmas Trees
How To Make Yarn Pom Poms – Wicker Basket Update
How To Make Scented Candles At Home – It’s A Lot Easier Than You Think
DIY Pallet Sign Ideas – Simple Decorations With Lots Of Charm
DIY Black and White Planter
 zpostcode
  Recruit
  weather
  mreligion
  Yellowpages
  sport
sport  constellation
  shopping
  name
name  game
game  directory
  literature
  Word
Word  tour
tour  furnish
  Lottery
  tftnews
  lyrics
  News
News  digital
  car
car  dir
dir  Edu
Edu  Finance